


Please refer to the parts guide here for clarification on parts mentioned.
Basic Maintenance
Oiling
The WE M4A1 doesn't need much in the way of lubrication. The trigger group and lower receiver workings, receive a bath of silicone (from gas blowby) through normal operation. I use propane with an adapter. I use Trinity 90 weight RC shock oil added to the tank every 3-4 mag fills.
There are parts in the upper receiver, that do need attention however.
Many on the forums know that I use Krytox, a very sophisticated and expensive lubricant. I have chosen to leave its use for a later, more advanced "how to". Many will not find Krytox within their budget (hundreds of dollars per bottle) so I have substituted more available options.
As mentioned, I use Trinity RC shock oil where it calls for a lighter lubricant. (O-rings mostly). See below.
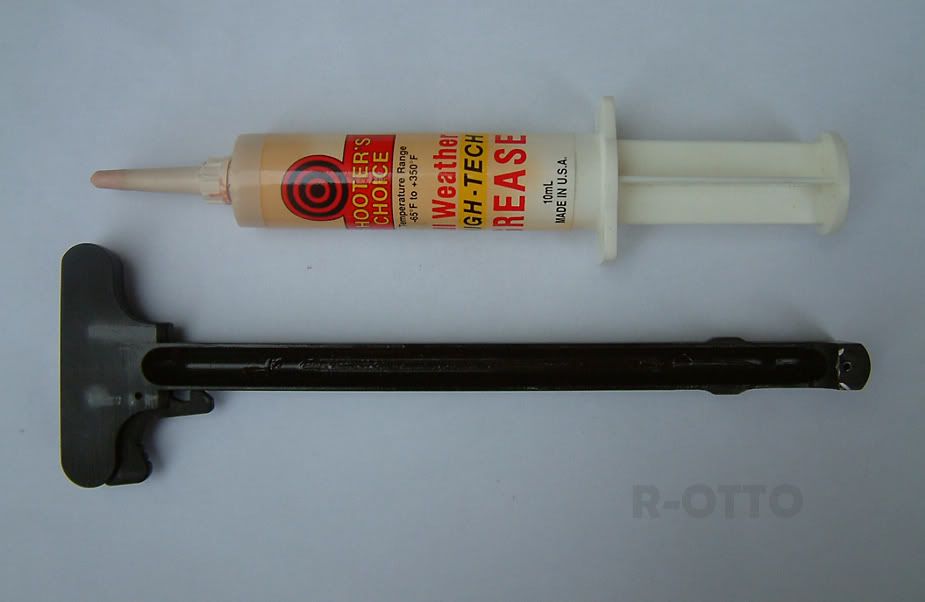
But some areas will require grease. I use Shooters Choice, a lightweight synthetic grease that works great in any temperature. It's fantastic and affordable. It also mixes well with silicone.
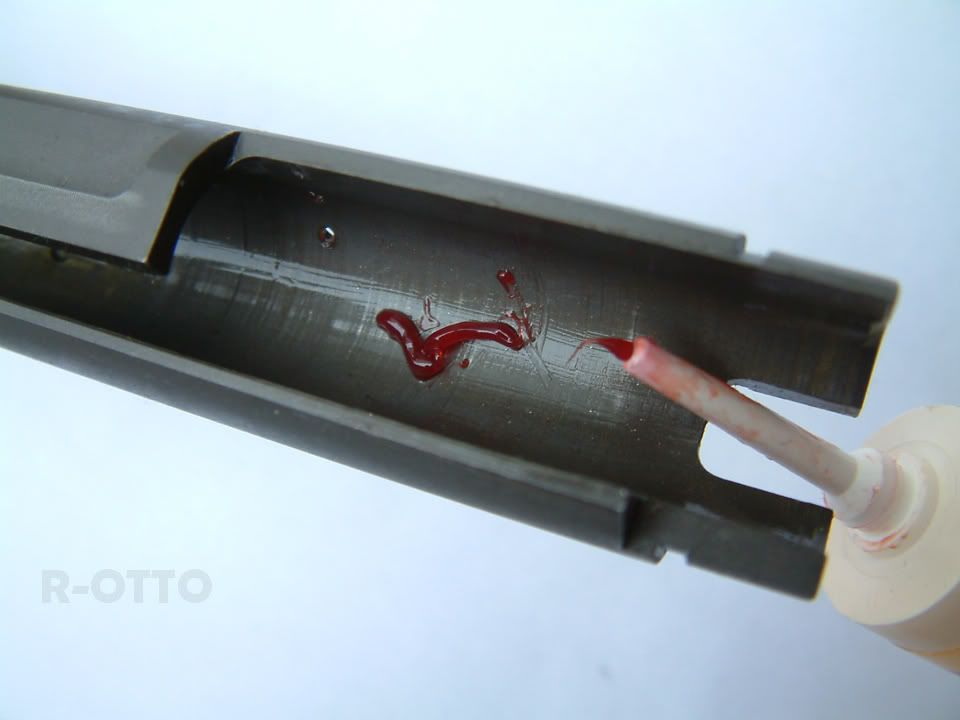
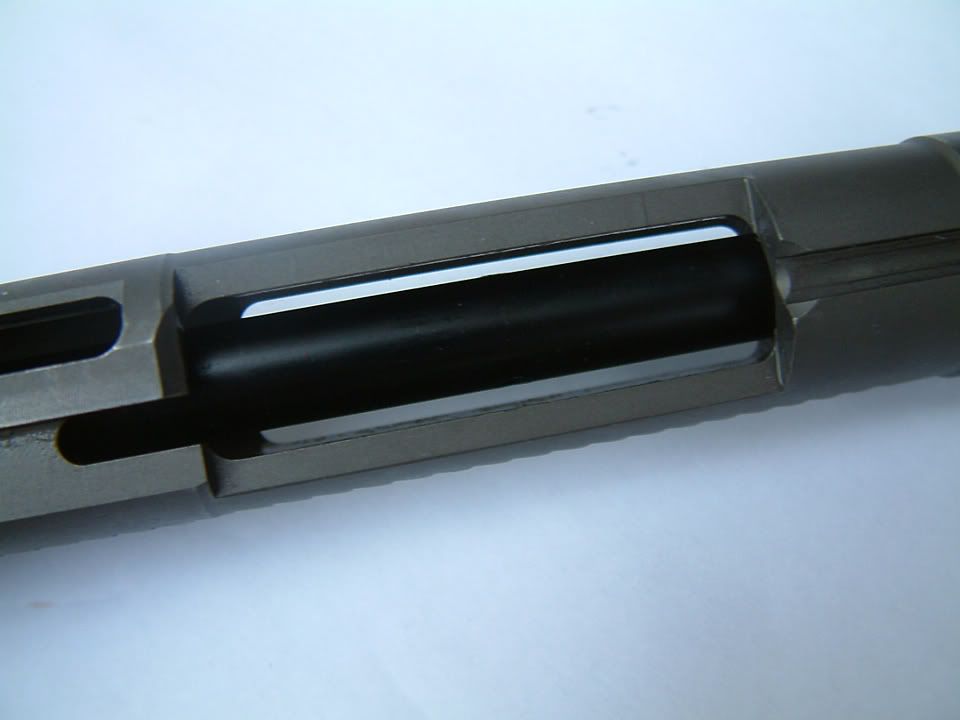
To help the action of the bolt being pulled back, apply a light smear of grease inside the bolt carrier where it contacts the outer surface of the cylinder. Apply here (seen below). Remember, a little goes a long way.
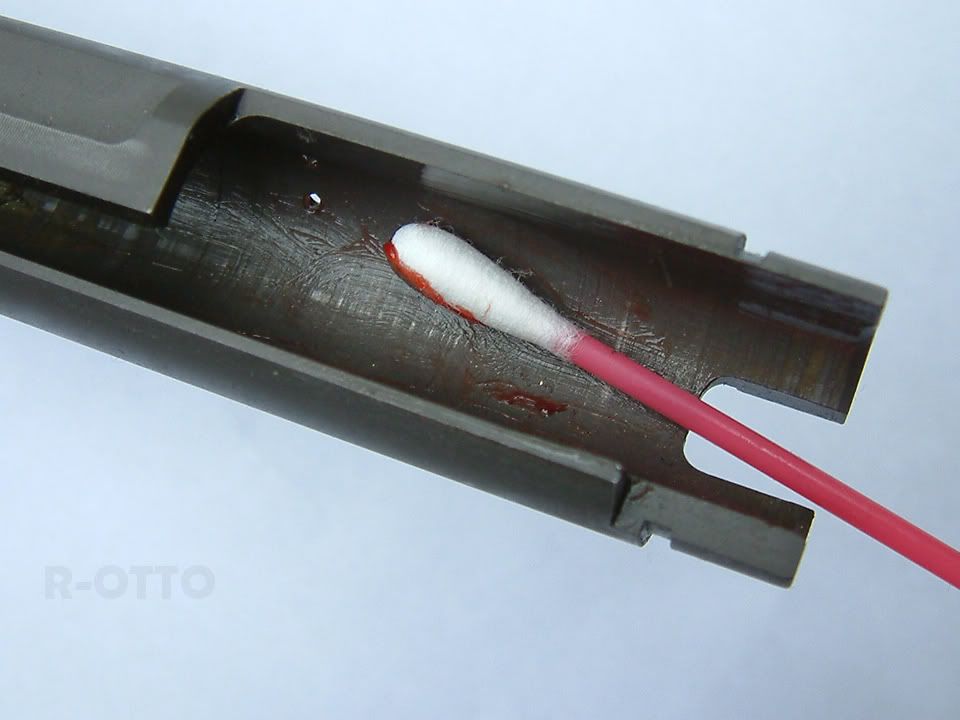
Smooth out the grease with a cotton bud (Q-tip).
Another place to apply Shooters Choice grease, is the charging handle track. This is where your upper roller rides. Apply a small bit and smooth it out with a Q-tip once again.
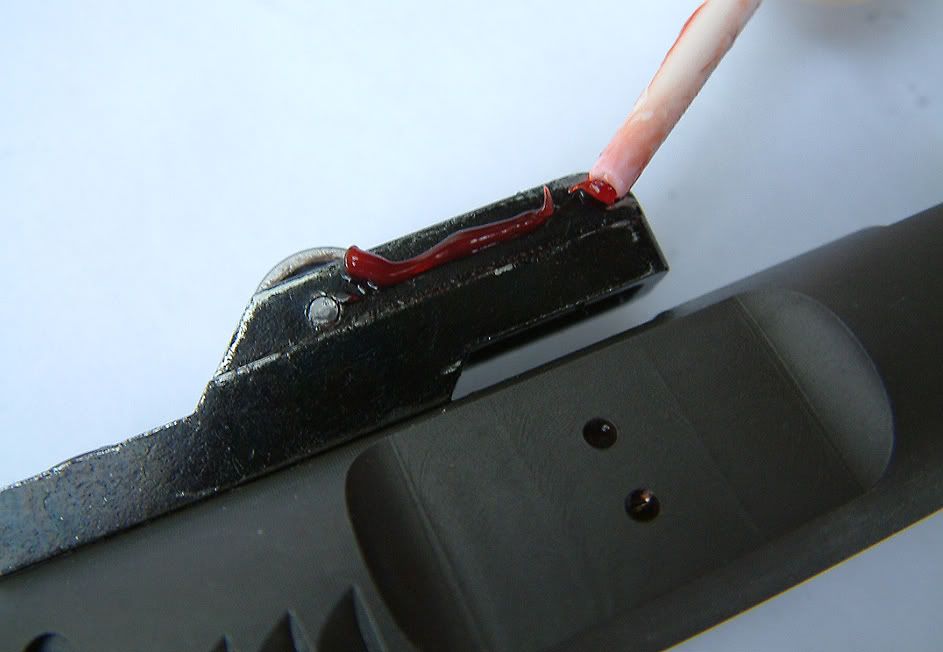
Last place to apply a bit of grease is the upper corners of the roller bearing casting. This area sees a bit extra wear and tear. It will also slow the action down if it is dry (drag). Be sure to keep it lubricated.
Exterior Cleaning
The best way to clean your rifle's exterior, is to use a Microfiber cloth.
Microfiber cloths come in many sizes and colors, but all will do the same great job at cleaning your WE M4.The best part about using the Microfiber cloths is that they do a fantastic job at absorbing the silicone that you will see oozing from your receiver gaps. They wick it away instantly with nothing left behind.
These cloths are available most anywhere these days, but the best place to buy them happens to be TARGET (In the states). Found in their automotive section, there are always good deals to be had on bundle packs.


Advanced Maintenance
Bolt Carrier - #36/#122
There has been much discussion on the forums concerning part #122. This rubber "face seal" washer can become shredded and chunked if the valve assembly (essentially part #38 - the black tube) falls out of alignment. The bolt which secures this part to the bolt carrier (#36) is prone to loosening.
When #36 loosens, the black tube (and valve head) will lean in all directions (not centered).
This creates an immediate problem for part #122.
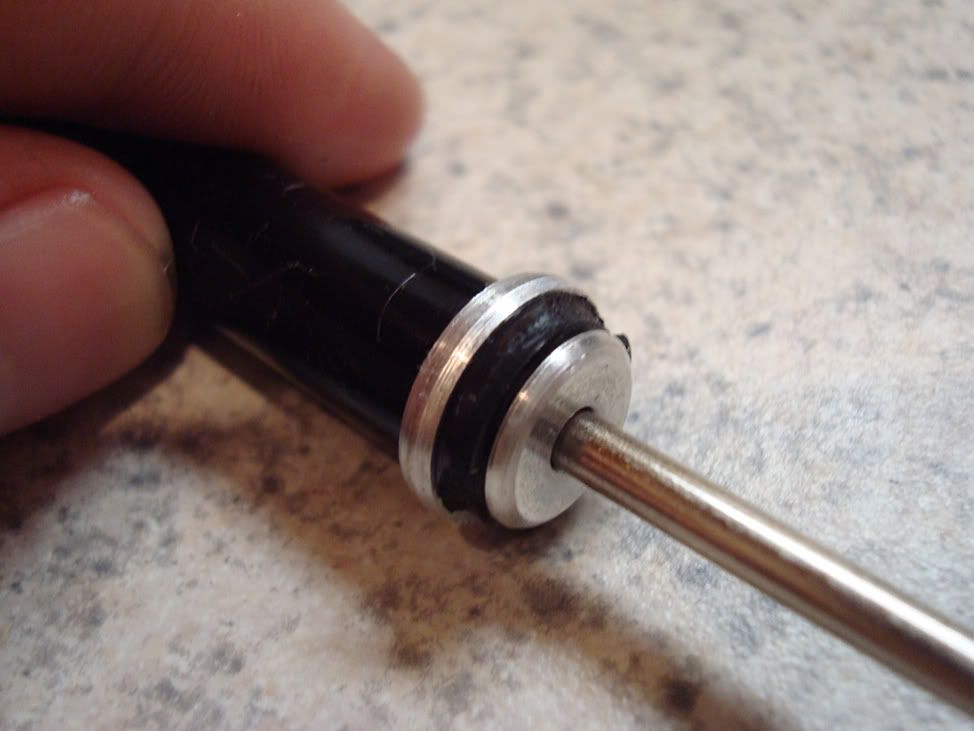
The rubber washer/seal (#122) attached to this assembly must leave the brass cylinder then re-enter on each stroke. If it isn't perfectly centered, the result is seen below. (Photo courtesy of Arnies member Wraithxt1)
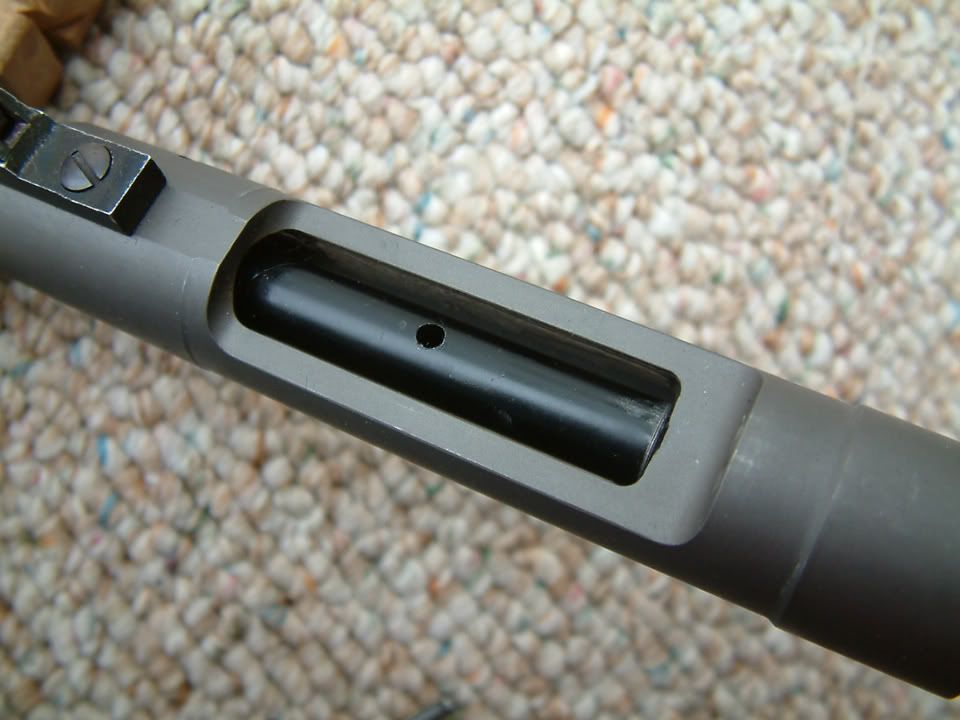
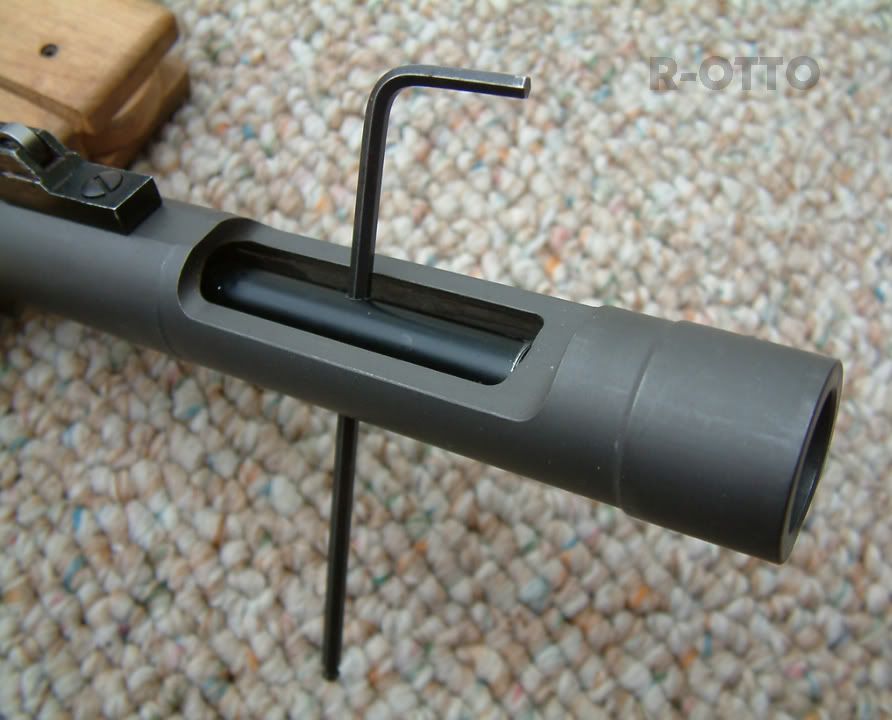
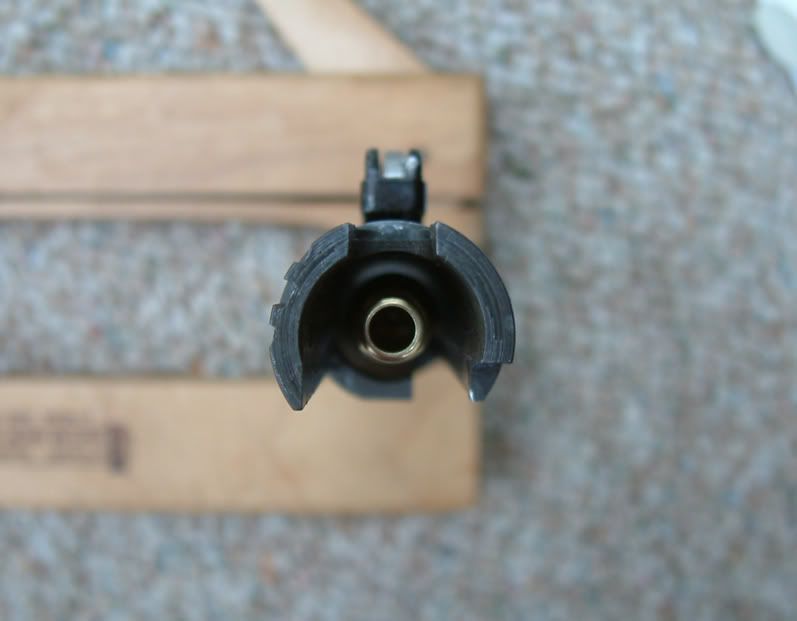
Here is the cylinder opening that the washer must contend with.
NOTE that mine has been polished with wet sand paper (1,500 or 2,000 grit). The factory cuts a chamfered inner edge however it isn't enough. Polish this inner opening until it is SMOOTH to the touch.
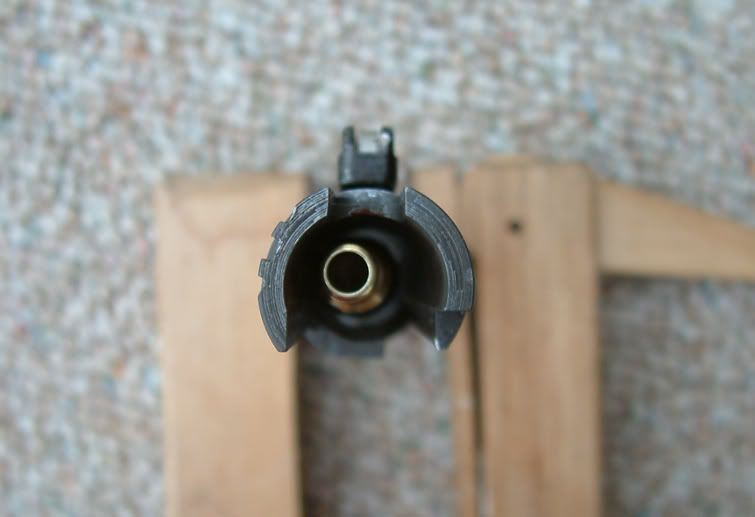
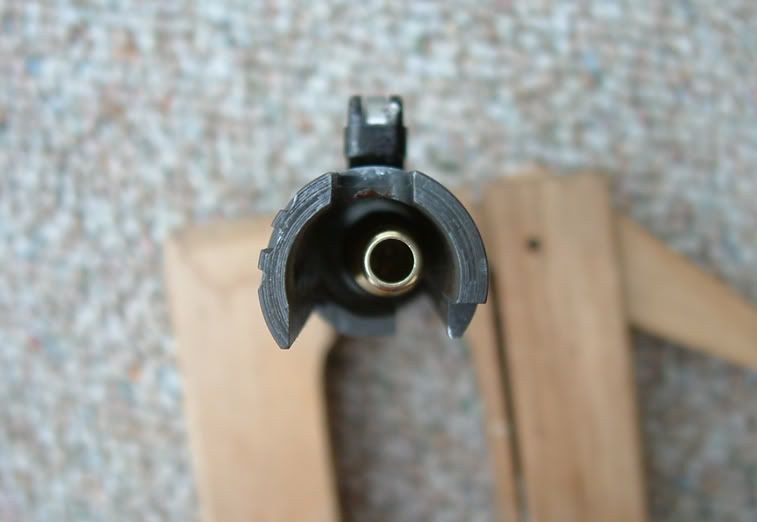
When bolt #36 loosens the result is a valve assembly that flops around and is misaligned. See below.
And again here. Leaning.
If this misaligned valve is allowed to re-enter that sharp brass cylinder opening for any length of time, it will shred and chunk off parts of the rubber washer until you see something like in the first pic.
First step in taking the bolt carrier/valve assembly apart is to loosen screw/bolt #36. If you have already locked this screw down with Locktite (as I have done) it will be difficult to loosen. If so, identify the vent holes on part #38 (black tube)
Slip a properly sized allen key into and across these holes. This will allow you to stop #38 from rotating while you loosen #36 with a standard screwdriver.
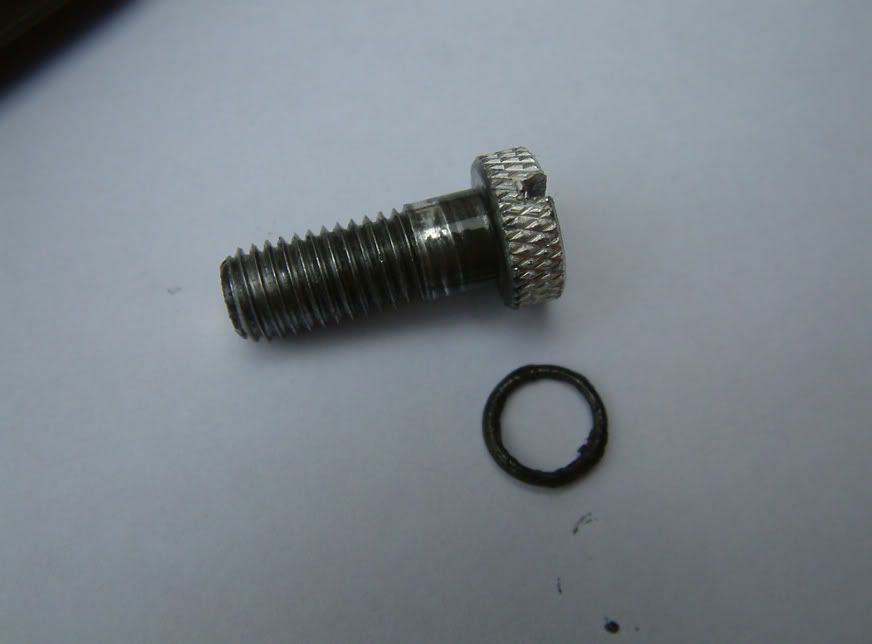
Here is a look at screw #36. It is at the end of the carrier. The gun working well - or not well - is dependent on this screw.
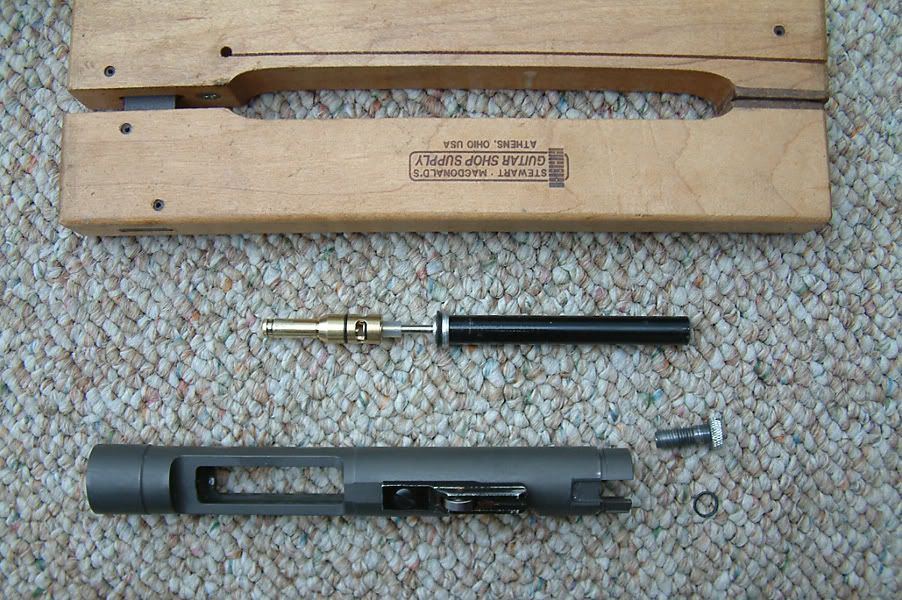
And here are the parts disassembled. Note the tiny o-ring, part #37.
You will quickly note that if the gun has had any use whatsoever, it will be covered in silicone. This must be removed before using any Locktite. It will not harden properly otherwise.
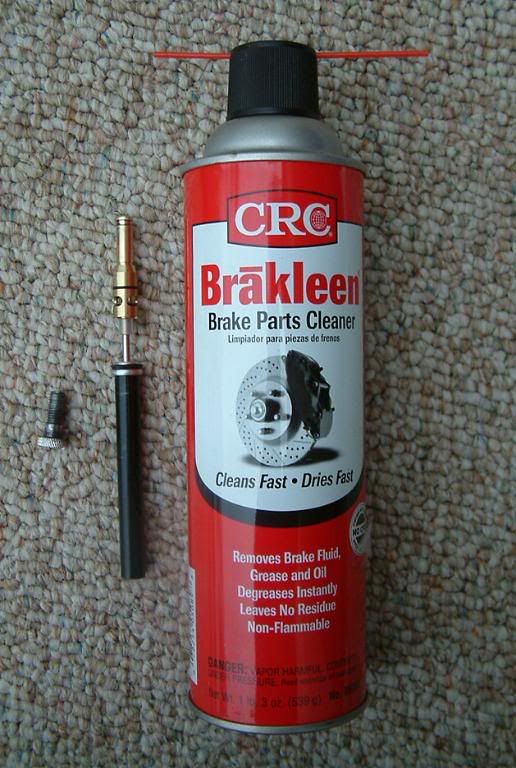
Use simple brake cleaner to degrease your parts. Available most anywhere.
After saturating the screw/bolt #36, spray some on a cotton bud and wipe the inner threads of part #38.
And here are the parts sufficiently cleaned and ready for reassembly.
This is a pic of what you will need to buy - BLUE Locktite, medium strength. It will allow disassembly in the future.
Two drops is all you need. Threading the bolt back in will smear the entire bolt - evenly applying the product.
When you tighten screw #36 back down YOU MAY NOT GET THE VALVE TO CENTER ON THE FIRST TRY. Keep "eyeballing" the assembly from the front end. If it isn't centered, loosen the bolt, rotate the black tube slightly then sock it down again. Keep doing this until you have the valve perfectly centered in the carrier (north south east & west).
NOTE that the vent holes in part #38 are now east and west, not north and south. If you can manage to get the part in this orientation, it is better for your operation, but not critical.
It doesn't matter where the vent holes end up, however, having the holes on the left and right is a good thing for one reason. The gas and silicone mixture that vents from these two holes will be deflected by the bolt carrier. Less will be drooling out the gap in your lower/upper receiver.
BULLSEYE!
A perfectly centered valve assembly. This is what you want to see in the end.
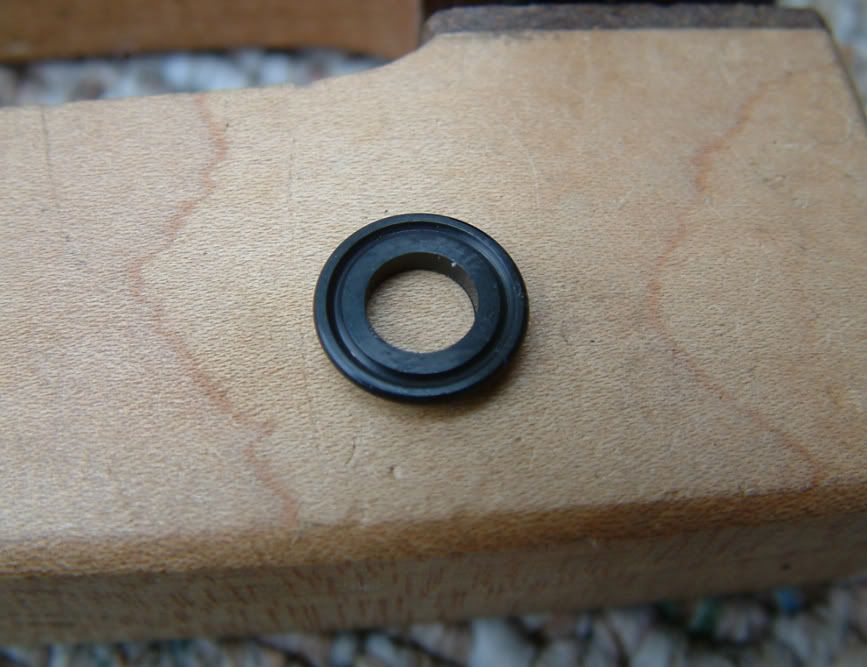
Below is a stock #122 rubber seal after approximately 6,000 rounds (3 bags of bb's). It is pristine. Taking the time to do the above will guarantee trouble free operation indefinitely. There is no issue with part #122.**
Compare to this brand new #122 below. There is no wear on my used part at all, even after extended use.
Lower Receiver & Trigger Pack
Temp
Inner Barrel Assembly & Hopup
Temp


